Design Your Own Log Cabin
Design Your Own personalised garden log cabin in just 6 easy steps with our unique system.
The Design Your Own log cabin system is perfect if you are looking for a standard log cabin design in a standard size. You can put together all the elements to design your own log cabin rather than picking from a set of designs that other people have come up with for you. If you have seen a design you like elsewhere you should be able to make a copy using the Design Your Own log cabin system.
If you are looking for something in a more specialised design or size, or you need some help with the design of your dream log cabin then you might be best looking at a bespoke log cabin.
1 – Choose Your Log Thickness:
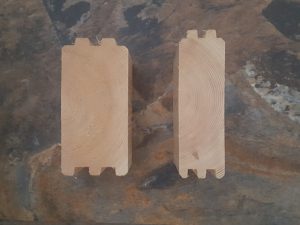
You have a choice of 44mm or 70mm double tongue and groove wall logs.
2 – Choose Your Size:
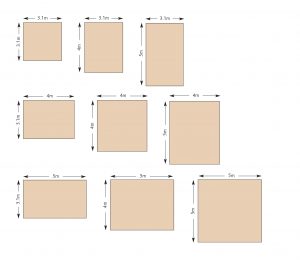
Pick the width (across the top) and depth (down the side).
3.1m x 3.1m
3.1m x 4m
3.1m x 5m
4m x 3.1m
4m x 4m
4m x 5m
5m x 3.1m
5m x 4m
5m x 5m
70mm log cabins will be 4.8m instead of 5m due to limited lengths in this thickness.
All sizes are external and measurements are in metres.
3 – Choose Your Roof Style:
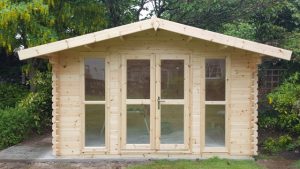
Apex Full Front
As you look at the front of the log cabin, the apex (or gables) will be on the front and back.
Apex Side
As you look at the front of the log cabin, the apex (or gables) will be on the right and left hand sides.
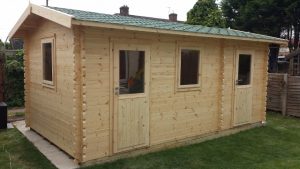
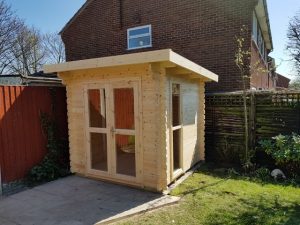
Pent
A single pitched roof with a small slope running from front to back
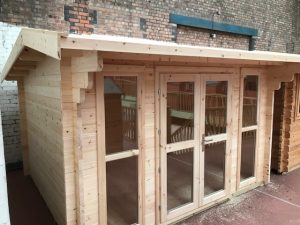
APent
An offset apex (gable) on the left and right hand sides so the front section of the roof is high pitched and the back section is low pitched.
4 – Choose Your Doors And Windows:
Single Door
Available in full glazed, half glazed and solid.
Right hand hinged as standard, left hand hinged on request.


Double Door
Available in full glazed, half glazed and solid.
Master door right hand side.


Single Window
Available in standard opening, 3/4 opening and 3/4 fixed.
Standard = 7 logs high, 3/4 = 10 logs high.

Double Window
Both sections opening.
Standard = 7 logs high.

Fixed Full Glazed Window
Both panels fixed.

5 – Add Extras:
Below you will find a number of extras that you can add on to your design your own log cabin to personalise it.
Extra windows
You can add extra windows to the sides and back to let in extra light.
Roof Shingles
You will need to waterproof your roof.
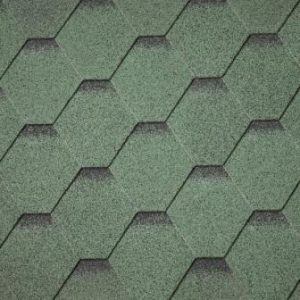
For apex roofs we use IKO Armourshield hexagonal roof shingles in a choice of red, green or black.
They have a bitumen layer on the back that heats up in the sun.
For pent and APent roofs we use EPDM rubber roofing in black.
If you don’t have roof shingles your log cabin will not come with a roof covering so you will need to fit your own product.
Construction
Save time and effort by letting our experienced team construct your log cabin for you.
The price for construction includes all fixings.
If you are buying for self build you will need to supply your own nails/screws etc.
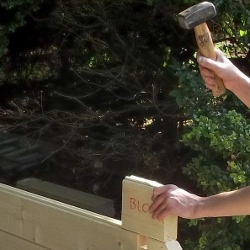
Partition
Create a second room.
Partitions are made from the same wall logs as the rest of the cabin and are interlocked at the corners at each side.

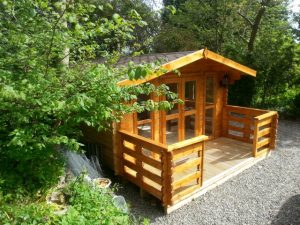
Veranda
Most the most of your garden with a veranda to sit out on.
Made from the same wall logs as the rest of the log cabin.
Tanalised decking on floor.
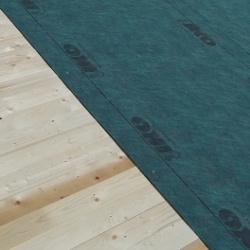
Roof Shingle Underlay
IKO Armourbase Pro underlay.
Lightweight breathable membrane.
Back-up protection for your roof.
Compulsory with roof insulation.
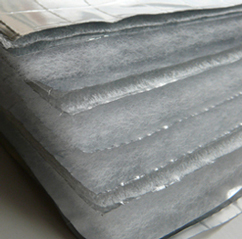
Roof Insulation
Stop warm air escaping through the roof.
Superquilt insulation rolls.
Fitted internally with a secondary roof to cover the material.
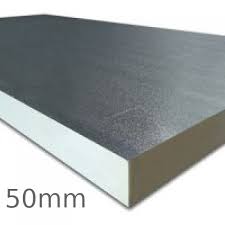
Floor Insulation
Prevent cold air coming up through the floor.
50mm thick insulation boards.
Fitted under the floor.
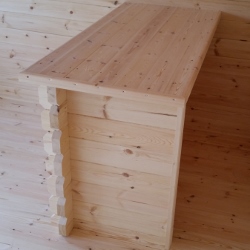
Bar
Made from the same wall logs.
Perfect for fun nights in with friends.
Clear Dip
Wall logs, rafters, windows and door frames and external trim can all be pre-dipped in a tank at our workshop in a solvent based, clear wood preservative. Dipping ensures all the parts of the log cabin which cannot be reached after construction can be protected including:
- Inside the interlock corner joint notches.
- insides of door and window frames
- Undersides of trim
The protector repels water. Once dipped the wood will stop soaking up water, instead water will bead and sit on top of the wood like it does on a duck’s back.
Advantages:
- Preventing water from being soaked up will help stop dirty looking water marks on the logs.
- Protecting the inside as well as the outside seals both sides against moisture and can help to prevent warping.
- Clear protector allows you to enjoy the natural colour of the wood on the inside of your cabin.
- Clear protector won’t make the inside of your cabin seem dark and gloomy.
- Clear protector gives you the choice of what colour to paint the outside of your cabin.
Need to Know:
- You will still need to treat your cabin on the outside with a coloured protector to prevent damage from the UV rays from the sun (it will fade and then go grey).
- There are a lot of factors that can affect how quickly the wood deteriorates including the weather, the location and the wood itself so it is hard to put a timescale on when it needs to be done by.
- For this reason we recommend doing it as soon as possible to prevent any signs of deterioration.
- Always do a patch test.
- If you are not worried about greying, the dip should protect your cabin from water for up to 12 months.
- But, please make sure you re-treat it as soon as you start to notice any deterioration, even if that is much sooner, because again it can be affected differently by things such as the weather, location and wood.
6 – Contact Your Local Agent For A Quote
Find the details for your local agent here. Get in touch and tell them what you what your Design Your Own log cabin is going to look like and any extras that you would like. They will be able to put together a quote for you.

